User's guide
INDEX
- What is the Irnerio Project?
- System requirements
- How to subscribe
- How to browse the archive
- How to search the archive
- Subscriber login
- How to request items
- How to view hi-resolution images
- How to add, modify and delete notes
1. What is the Irnerio Project?
The Irnerio Project is an online application which allows access to low-resolution and hi-resolution (upon a cost-fee subscription) images of the codices from the collection of the Real Collegio di Spagna. The whole collection is accessible in low-resolution mode to anyone, andsubscribers are assigned a finite number of credits and are free to choose which codices, works or pages are to be added to their personal library and accessed in hi-resolution mode.
2. System requirements
Software
- Browser: MS Internet Explorer 6, MS Internet Explorer 7, Firefox 1.5, Firefox 2, Opera 9.10.
- Adobe Acrobat Reader (or other PDF viewer) is needed to view and print the contract in case of subscription.
Security and options
- A static / fixed IP address (used for security checks).
- Javascript support enabled.
- Session cookies enabled.
3. How to subscribe


You will receive an e-mail at the address you specified which will provide you some details and a link to the PDF contract for you to download. The contract has to be filled out, signed and sent back via street mail to CIRSFID following the procedure detailed in the PDF file.
4. How to browse the archive

Click 'Codices' to access the complete list of codices available.

While browsing the complete list, when you pass your mouse over any single codex as identified by its number or letter, you will be presented a sneak preview of some relevant information (such as century, material, foliation, etc) in the right column, under the title 'Codex preview'.

You can also filter codices by century using the drop-down menu 'Filter by century' on the right.

Once you have selected which codex you are interested in, click its letter or number link once to access that codex' main page.
This page presents base information, a description, and the works (opere) pertaning to the codex itself. The list on the right, 'Unnumbered pages', lists special pages, such as the cover or the fogli di guardia. If you have subscribed, you are currently logged-in, you haven't already added this codex to your items and you have credits left, you will also see a 'Add codex to selected items' link, which allows you to mark the whole codex and select it to be later added to your library. See How to request items.

If you select a single work by clicking on its title, you access the work's main page, with work-related information and low-resolution images of its pages. The work's main page is also its first page. If you subscribed, are logged-in, haven't already added either the whole codex or this work to your library, and have credits left, you will also be presented menu items which allow you to mark this work or this page and select either one to be later added to your library.See How to request items. If you already added either the work or page to your library and are currently logged-in, you may access the hi-resolution image of the page by clicking the'Show hi-res' link. See How to view hi-resolution images.

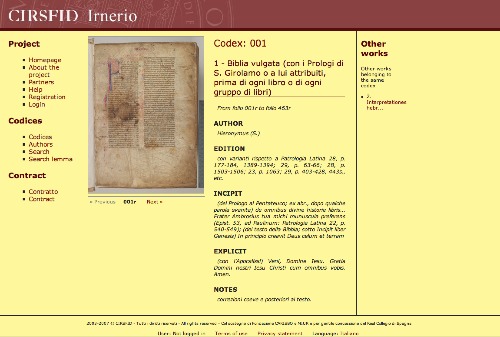
As the work's main page is actually just its first page, a convenient navigation menu right under the image itself allows moving forward and backwards among all of the work's pages.

5. How to search the archive
You may use three different main paths: if you click on the main menu item 'Authors', you may select the initial letter from the author's name to browse a complete alphabetical list and make your choice by clicking, or you may use the
-
Search authors
entryfield and start typing.

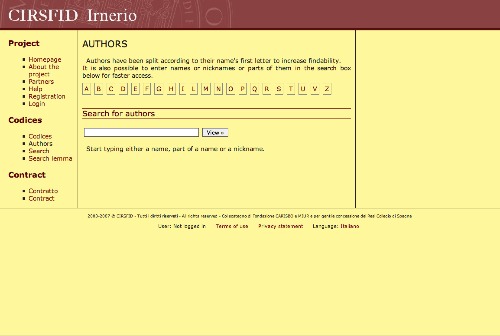
This field is an autocompleter fields, so the more you write, the stricter the results. If you just type 'a' you will have too many, but if you keep on typing, say 'acc', your results will start to look more promising. This is obviously only useful is you already know at least part of the name of the author you are looking for. Either way, when you have your author, clicking it's name will take you to the author's page, which lists his works, grouped by codex. Clicking again on any work link will take you to that work's main page.
-
Search
If you click on the main menu item 'Search' you are presented a new page with an empty entryfield.

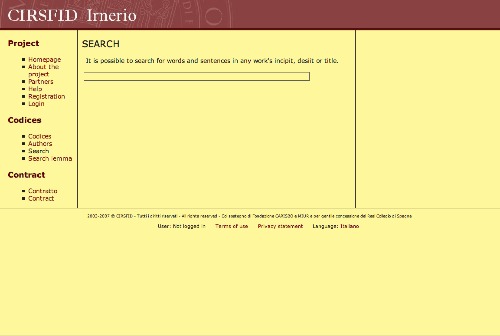
Again, this works like the author's entryfield. Start typing, and the text you enter will be matched with the works' incipit and desiit. The more you write, the more strict accurate the results. Once you find the work you are looking for, click on the link and you will be taken to that work's main page again. See How to browse the archive for more details.
-
Search lemma
If you click on the main menu item 'Search lemma', you may search the archive using the internal thesaurus. The Irnerio Project allows historians to associate terms, lemma, from an internal thesaurus to any work, incipit, explicit and segue. Terms are presented as part of a drop-down list from which you can choose.

The check boxes on the right allow you to decide if you would like to search lemma associated to any combination of work, incipit, explicit and segue. You need to check at least one of these to avoid being presented with no results.
6. Subscriber login

If you click 'Login' from the main menu, you are requested a user name and a password. If you subscribed and received them, enter them to access your account. If you are successfully logged-in, the main menu will show you a new sub-menu, 'Administer', with 'Profile' and 'My collection'. Clicking the latter you may visualize your library, clicking the former your account data (such as credits left). If you receive a bad username or bad password warning, please check that you wrote both exactly the way they are spelled.


This is the user account page. It lists:
- User: id used to access the project
- First name: user's first name.
- Last name: user's last name.
- Date of first logon: the first time the user logged in.
- Date of last logon: the last time the user logged in.
- Date of expiration: the date the subscription will cease its validity and the user will not be able to login.
- Initial credits: the number of credits given to the user upon subscription.
- Remaining credits: the number of credits still available. That is, the initial credits minus the total page-value (1 credit, 1 page) of the codices, works and pages the user has added to his or her library.
7. How to request items
Once you are logged in, you can add codices, works or pages directly when browsing the relevant pages. See How to browse the archive.

When on the codex' page, you can add the whole codex at once.

When on the work's page, you may add the entire work, from first page to last page, or any single page to your list of requests. This list is accessible via 'My collection' and have to be confirmed to enter your library.

Here you have two distinct lists: at the top of the page, under 'Pending items', you are shown your not-yet confirmed requests. You can either 'Confirm' them so they are added to your library, or 'Remove' them, so they are not (and you are not charged any credits). In case you erroneously remove something, you can simply re-add it later; below, under 'Acquired items', you have the complete list of items in your library. These you can browse in hi-resolution mode.
9. How to view hi-resolution images
Once you are logged-in and have added a codex, work or page to your library, you can access their hi-resolution images. While browsing, just click 'Show hi-res' to be taken to the hi-resolution mode. Since these images are quite large, loading times are highly dependent on your connection speed.

When browing hi-res, you may have notes on the right of the page, depending on whether that page has been commented or not. These are linked to hot-spots or areas of the image, which are the object of the comment. You can toggle these on and off using the 'View / hide notes' button.

If you click a note's green arrow, you access that note's text.


You can enlarge or shrink (if enlarged) the image using the 'Zoom in ' and 'Zoom out' buttons. Once you have an enlarged image, drag with the mouse to scroll it around. When notes are available and your mouse is over an image hot-spot, the relevant note gets highlighted.

10. How to add and delete a note
If your profile allows to add notes, you will have a 'New note'
button in the hi-resolution image menu. Click this, and then click
'Draw area' to add a new note and a new hot-spot (which you can enlarge
to the whole image if it's not connected to a specific part of the
page). Use the WYSIWYG editor to type your name (Author), your text,
and choose if you are commenting on the page text, or a miniature or
glyph.

If you are the author of a note, you are also allowed to delete it by clicking the white cross on red button on the left of any note.